The Table Mask
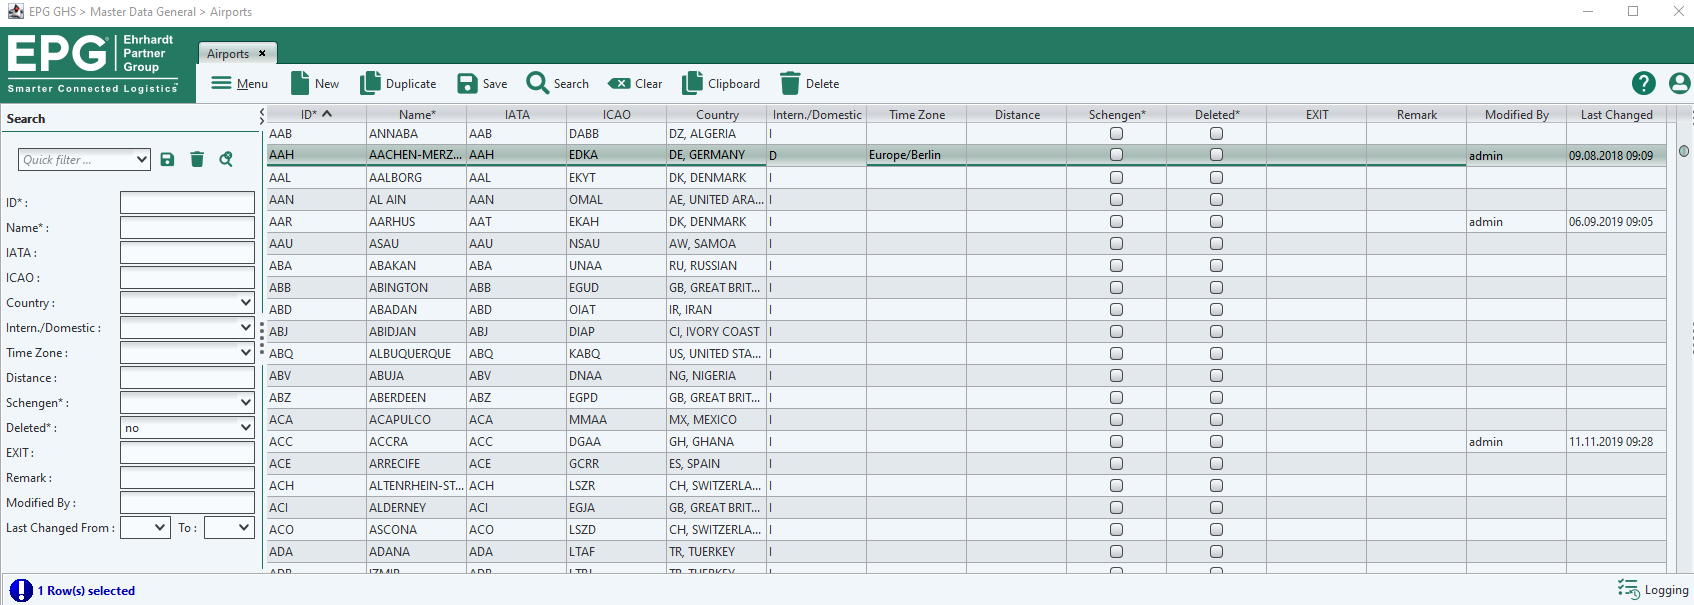
In the figure below the table Airports of the master data module General is opened, displaying all data captured about worldwide airports. Accordingly, the table flag Airports is shown at the top of the Table Mask.

The table Airports
Upon opening a table, no data is displayed. In order to read all data available for a table, the button Search ![]() can be used.
can be used.
Very often it is recommendable to define some filter rules before a Search is started. For example, if you are working on an expanded seasonal flight schedule containing thousands of flights, using filters helps to concentrate on those flights you actually want to edit and saves system resources. For more information about filters, see chapterDefining Filters in the Search panel.
By clicking the column titles in the table headline (like ID*, Name*, IATA etc.) the table entries are automatically sorted alphanumerically (0-Z) according to the selected title. A second mouse click on the same headline reverses the sorting (Z-0); a third click removes the sorting and returns the table listing to the original state.
You can also use a second column to 'sub-sort' the list again by holding the "Ctrl"-button pressed by clicking on the column's header (i.e. identical entries from the first sorting are again sorted according to the entries from the second column).
You can browse through the data fields from the left to the right by using the TAB key. Upon reaching the end of a line, the next TAB key action switches to the beginning of the next line. Alternatively, you can also use the arrow keys for browsing through the data fields. You can also fill-in data fields you have activated by tabbing through the table. Activated table fields containing a checkbox can be toggled on/off with the space bar.
Editing Data in the Table Mask
Data can be edited directly in the Table mask by marking the respective data field and then entering the data accordingly. You can store changed data either by clicking in another line, which automatically saves changes, or by using the button Save pending data ![]() from the task bar at the top.
from the task bar at the top.
As already stated in the previous chapters, the table view sometimes only shows a selection of core data. All record entries can be viewed and edited in the Search/Edit panel (see chapter The Search/Edit Panel).
Important: If you switch the table you are working on before you have stored the data as described above, your changes will be lost! Successful data storage is commented in the lower left corner with the message "Changes saved!".
Creating a New Data Record
New data records are created by clicking the button Create a new object ![]() in the task bar. This will result in a new, empty line being added to the active table, where you can enter the required data.
in the task bar. This will result in a new, empty line being added to the active table, where you can enter the required data.
Important: Please remember that the new line in the table often only shows the core data fields. In these cases, additional data can be added in the Search/Edit panel (see chapter The Search/Edit Panel).